Kitchen Backsplash: 4 Simple Steps to Get Started On Your Kitchen Remodeling in Sterling VA13 min read
Designing your kitchen backsplash does not have to be a hectic task. Enhancing the aesthetic appeal of your kitchen doesn’t always require a major renovation. One simple yet impactful way to elevate your kitchen’s design is by installing a stylish backsplash. A kitchen backsplash not only protects your walls from splashes and spills but also adds a touch of personality to the heart of your home.
While installing a backsplash all around the whole kitchen island is an option for homeowners, the most important places you should install and replace it are where water damage, oil damage, and stains are most likely to occur. After all, it will be cost-efficient to clean and replace your backsplash rather than having to change your paint.
Contents
How To Get Started With Kitchen Backsplash
Whether you’re an avid home chef or someone who simply enjoys the warmth of a well-designed kitchen, there’s a transformative element that can elevate both the aesthetics and practicality of your kitchen or kitchen remodeling process in Sterling VA – the kitchen backsplash.
Step 1) Determine the Objective of Your Kitchen Backsplash
Understanding the purpose and goals of your kitchen remodelers and backsplash will guide your decision-making process and result in a design that not only looks appealing but also serves practical functions. Here are key considerations to help you define the objectives of your kitchen remodeling and backsplash for your kitchen remodeling in Sterling VA:
Functional Needs
Assess the functional requirements of your kitchen space. Consider areas that are prone to splashes, stains, and moisture, such as behind the stove and sink. The primary function of a backsplash is to protect your walls from these elements, so identify the specific areas that require this practical safeguard.
Ease of Maintenance
Determine how much time and effort you’re willing to invest in maintaining your kitchen tile backsplash. Some materials are easier to clean and maintain than others. If you prefer a low-maintenance option, consider materials like glass or ceramic tiles for floors that are resistant to stains and can be easily wiped clean.
Aesthetic Enhancement
Consider the visual impact you want your kitchen backsplash to have. Are you aiming for a subtle, cohesive look that seamlessly blends with your overall kitchen design, or do you want it to be a focal point, making a bold statement? The aesthetic objective will guide your choice of materials, colors, and patterns.
Personal Style and Expression
Think about how you can infuse your personality and style into the kitchen through the backsplash. Whether you prefer a classic, timeless design or want to experiment with bold and trendy patterns, the backsplash provides an opportunity for creative expression. Consider elements such as kitchen cabinets or a kitchen island that resonate with your taste and complement the existing decor.
Coordination with Kitchen Elements
Take into account the other elements in your kitchen, such as cabinets, countertops, and flooring. The objective is to create a harmonious and cohesive design. Decide whether you want the backsplash to seamlessly blend with these elements or serve as a contrasting feature that adds visual interest.
Budget Constraints
Establishing a budget is a crucial aspect of determining your backsplash objectives. Different materials come with varying price points, and understanding your budget constraints will help narrow down your options. This ensures that your chosen backsplash not only aligns with your goals but also fits within your financial parameters.
By taking the time to carefully determine the objectives of your kitchen backsplash, you lay the foundation for a successful and satisfying design journey. Better do this before making any transactions with any remodeling contractors or kitchen remodeling companies.
Step 2) Determine The Backsplash Surface Area
When planning for a kitchen backsplash, accurately determining the surface area you intend to cover is critical in ensuring a successful and visually appealing installation. Here’s a guide on how to effectively calculate and measure the backsplash surface area.
Define the Coverage Area
Begin your project by identifying the specific areas where you want to install the backsplash. Common locations include the space between the countertop and upper cabinets, behind the stove, and around the sink. Clearly outlining these areas will help you focus your measurements and calculations.
Measure the Width and Height
Use a tape measure to record the width and height of each section of the backsplash. Measure from the countertop or the base to the upper cabinets or any stopping point where you want the backsplash to end. Take precise measurements, especially in areas with outlets, switches, or other obstacles that may affect the layout. If unsure, ask for assistance with kitchen renovation services to guide you.
Account for Obstacles
Note the presence of any obstacles such as appliances such as electrical outlets, light switches, plumbing, or other plumbing fixtures within the backsplash area. Measure the dimensions of these elements and subtract them from the total surface area. This ensures that the backsplash fits seamlessly around these features.
Calculate the Total Square Footage
Multiply the width by the height for each section of the backsplash and then sum these measurements to determine the total square footage. For irregularly shaped areas, divide them into smaller rectangles or squares, measure each part separately, and add up the individual calculations.
Total Square Footage = Σ (Width x Height for each section)
Factor in Overages
It’s advisable to account for overages when purchasing materials. Industry standards typically recommend ordering 10% more material than the calculated cost per square footage to accommodate potential errors, cutting adjustments, or future repairs. Round up to the nearest whole number when determining the quantity of materials needed.
Consider the Design Pattern
If you’re planning a specific design pattern, such as a herringbone or diagonal layout, the calculations may vary. Take the time to plan the entire project pattern and adjust your measurements accordingly, considering the additional coverage needed for the chosen design.
Consult with Professionals
If you’re unsure about the measurements or have a complex kitchen layout, consider consulting with professionals from kitchen renovation companies or a kitchen remodeling contractor. Many home improvement stores or tile suppliers offer free estimates and assistance in determining the right quantity of materials based on accurate measurements.
Keep Detailed Records
Document your measurements and calculations for future reference. This is particularly useful if you plan to make changes or additions to your backsplash in the future. Having a detailed record will help streamline the process if you decide to undertake a renovation project for kitchen and bath remodeling in Sterling, VA.
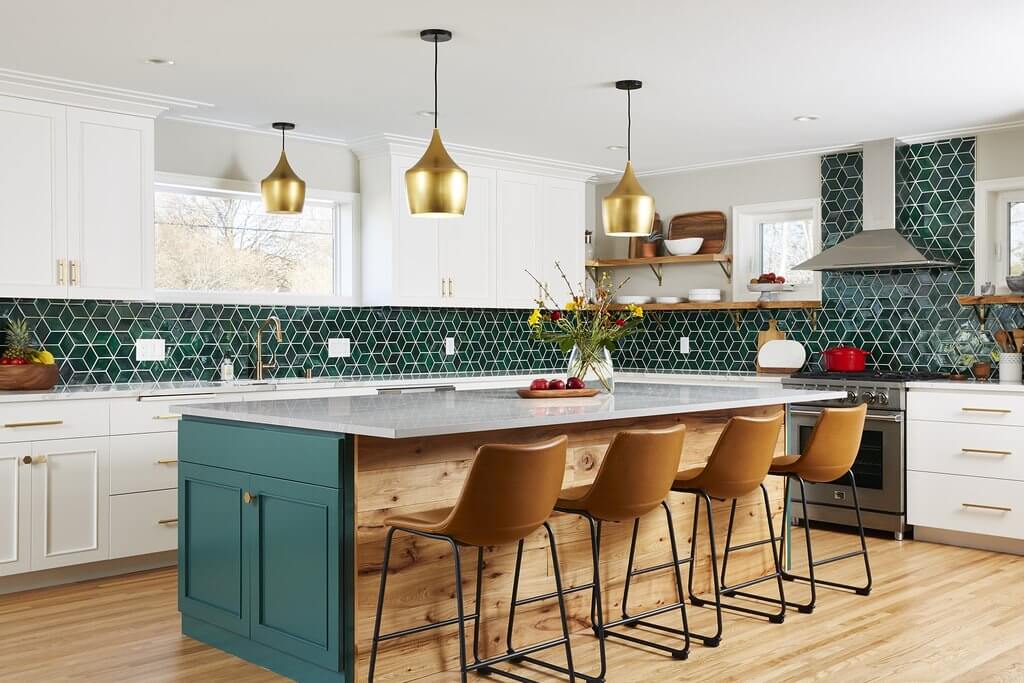
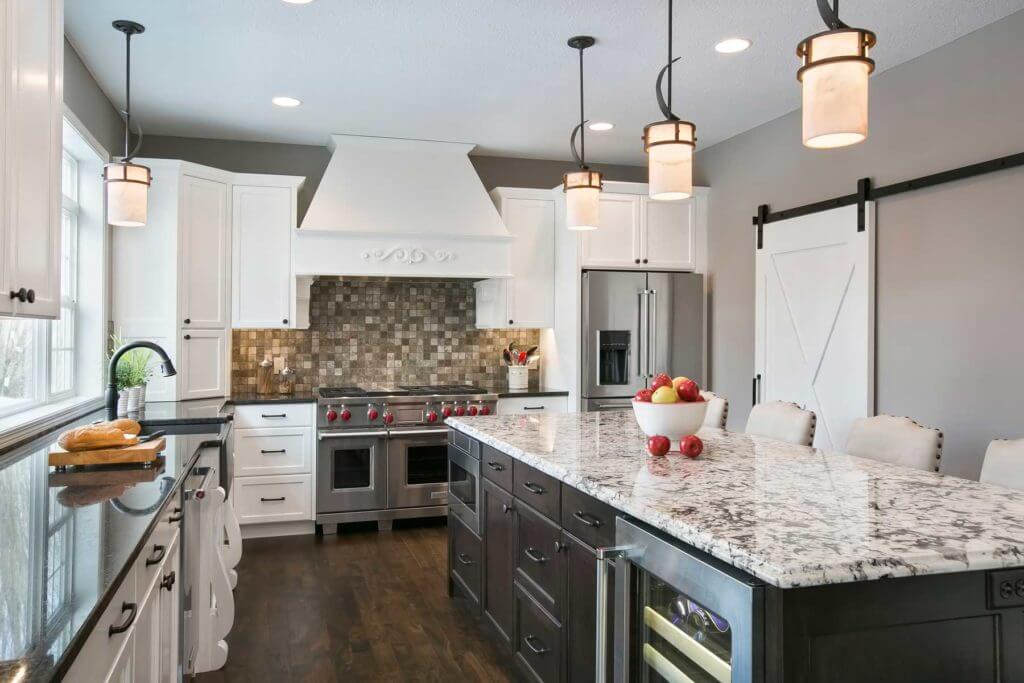
Step 3) Choosing a Backsplash Design Based on Your Kitchen Style
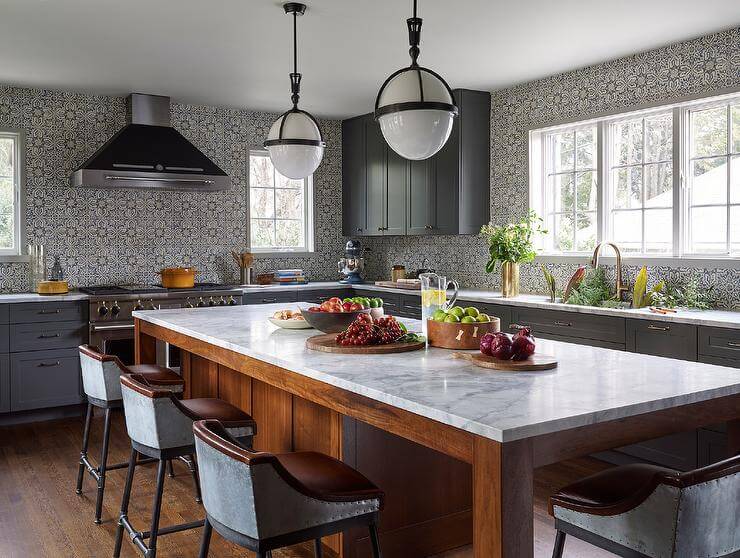
Selecting a backsplash design that harmonizes with your kitchen style is a pivotal step in creating a cohesive and visually pleasing space. The backsplash serves as a focal point, tying together various elements in your whole kitchen design. Here’s a guide on how to choose a backsplash design for your kitchen remodel based on your kitchen size and style:
Consider Your Kitchen Style
Begin by identifying the overall style of your kitchen. Is it modern, traditional, farmhouse, industrial, or perhaps a blend of different styles? Understanding your kitchen’s aesthetic will guide you in selecting a backsplash that complements and enhances the existing design. For best results, ask for professional kitchen remodeling services before you start your kitchen remodel.
Modern Kitchens
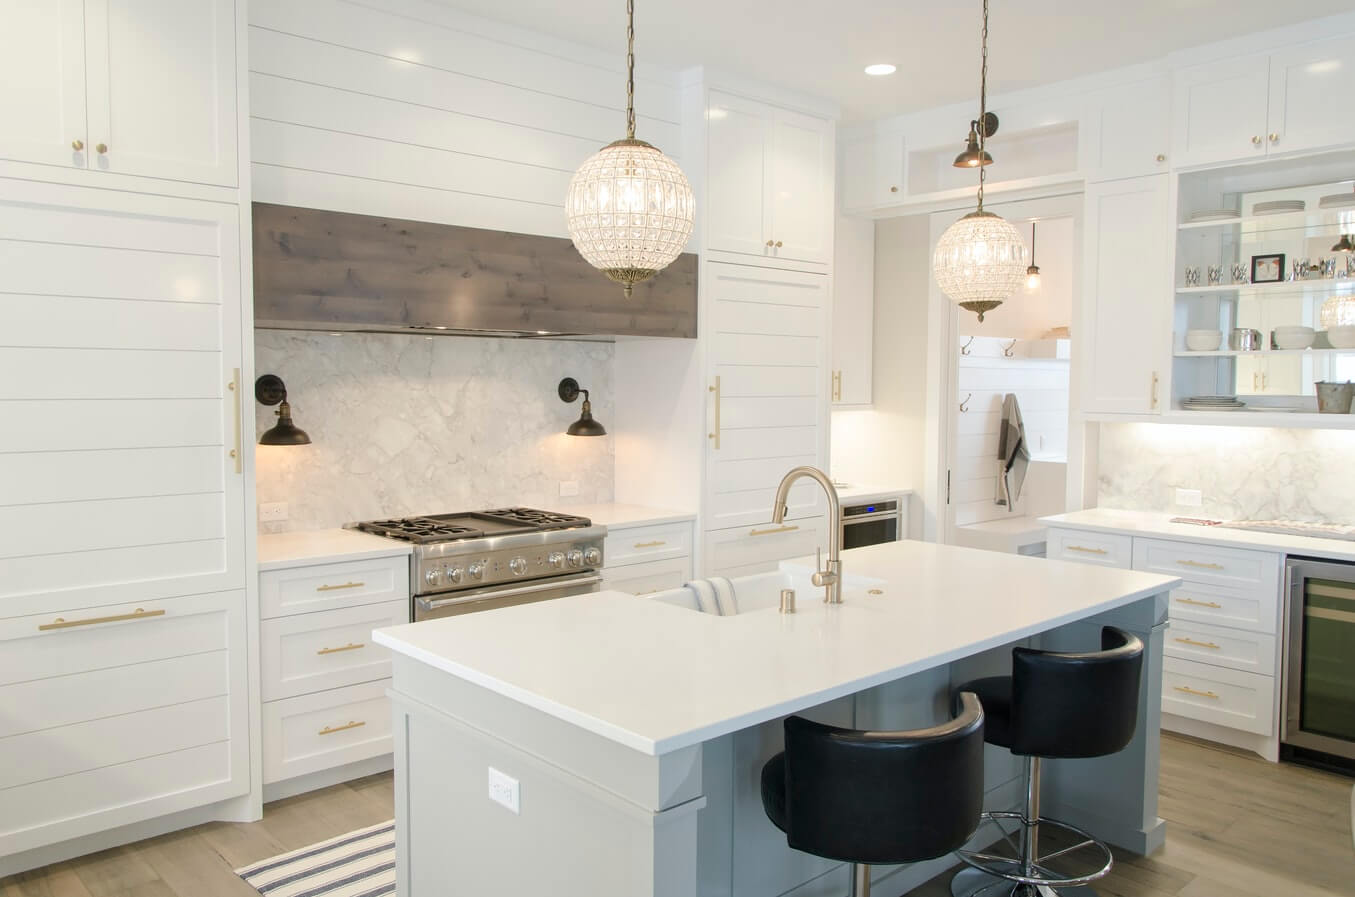
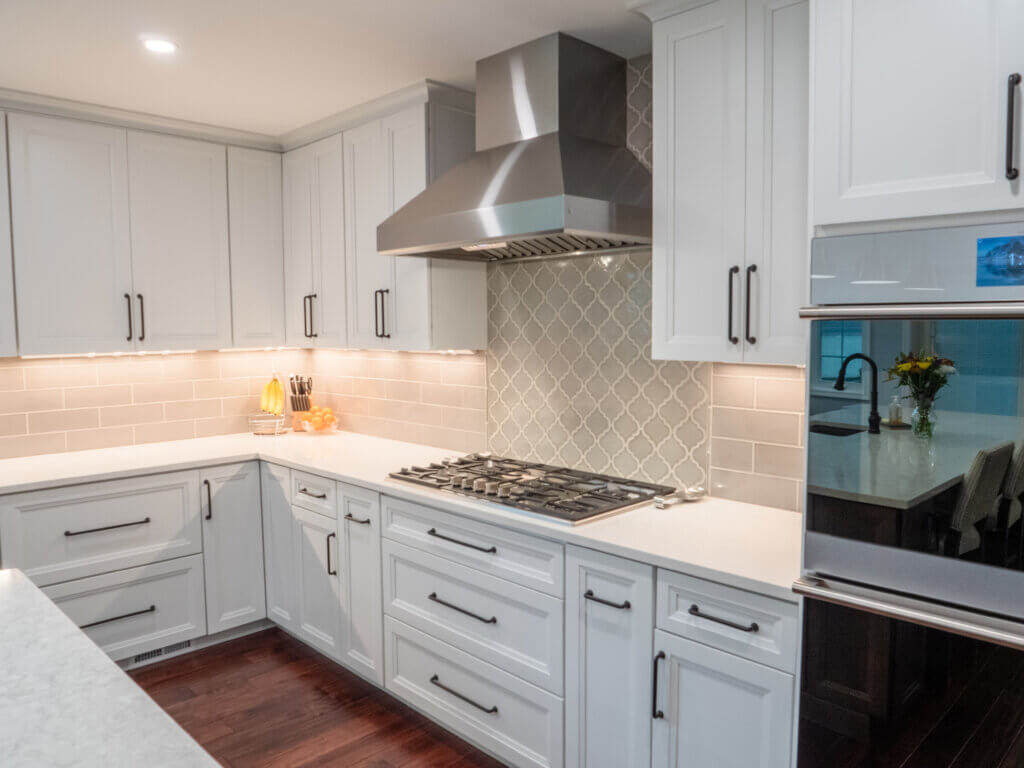
For modern kitchens characterized by clean lines, many appliances, light fixtures, and sleek finishes, consider backsplash options that reflect a contemporary aesthetic. Subway tiles, large-format porcelain tiles, or glass mosaic tiles in neutral tones can contribute to a minimalist and sophisticated look for an old kitchen.
Traditional Kitchens
In traditional kitchens with classic cabinetry and ornate details, opt for timeless backsplash and flooring choices. Ceramic subway tiles, beadboard flooring, or intricate mosaic patterns in subdued colors can add a touch of elegance while maintaining a sense of tradition.
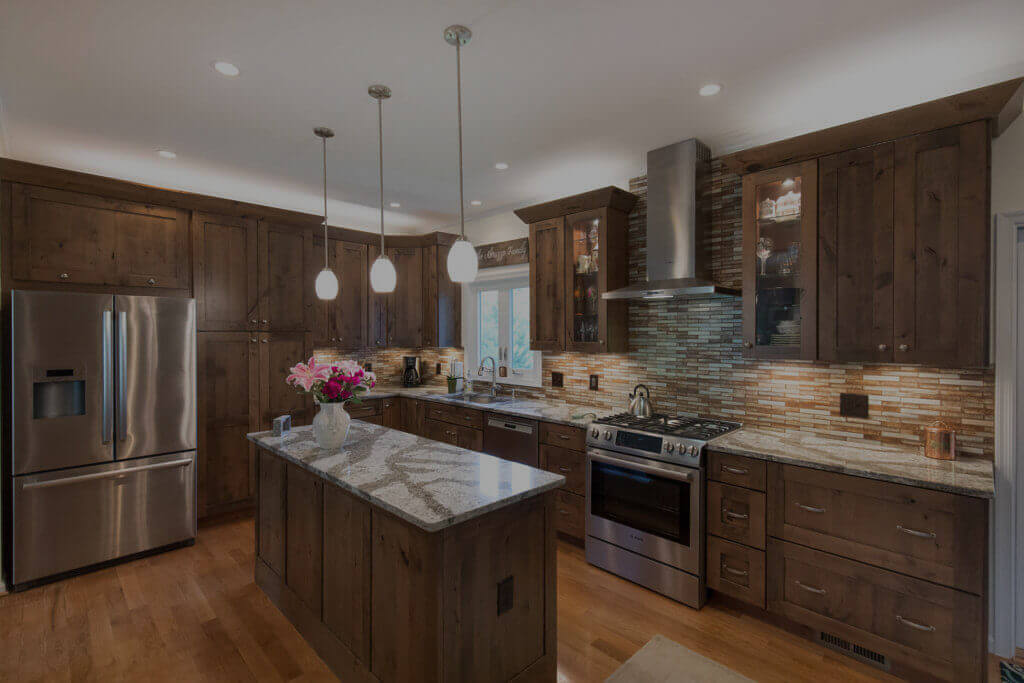
Farmhouse or Cottage Style
Farmhouse kitchens often feature rustic elements and vintage-inspired details. Achieve this look with subway tiles, especially in a herringbone pattern, or choose beadboard for a charming, country feel. Earthy tones and textured materials contribute to the warmth associated with farmhouse or cottage styles.
Industrial Kitchens
If your kitchen has an industrial vibe with exposed brick, metal accents, and concrete surfaces, consider using countertops and backsplash materials that complement this aesthetic. Stainless steel, concrete tiles, or subway tiles in darker hues can enhance the raw and edgy appeal of an industrial kitchen.
Transitional Kitchens
Transitional kitchens blend elements of both traditional and modern styles. In such spaces, you have the flexibility to choose a backsplash that balances these features. Subway tiles in a contemporary layout, granite, geometric patterns, granite, or a mix of materials can work well in transitional kitchens.
Color Coordination
Pay attention to the color scheme of your kitchen cabinets. Choose a backsplash that either complements or contrasts with the existing kitchen cabinets” colors. Neutral tones create a timeless and versatile backdrop, while bold colors or patterns can inject personality and vibrancy into the space.
Coordinate with Countertops and Cabinets
Ensure that your backsplash harmonizes with the countertops new appliances kitchen counters new appliances, and cabinets. Consider the material, color, and finish of these elements when making your selection. Cohesiveness among these components creates a polished and well-thought-out design.
Experiment with Patterns
The way you arrange tiles can impact the overall aesthetic. Experiment with different patterns such as herringbone, chevron, or a classic brick layout to add visual interest. Choose a pattern that aligns with your kitchen style and complements the overall design.
Personal Touch
Don’t hesitate to incorporate your style into the design of your kitchen remodel. Whether it’s a custom mosaic, a pop of color, or a unique layout, adding a personal touch ensures that your kitchen reflects your personality and preferences.
Step 4) Select the Right Material for Your Kitchen Backsplash Design
Each material has its unique characteristics, offering homeowners a range of aesthetics, durability, and maintenance requirements. Here’s a comprehensive guide to help you choose the perfect material for your kitchen remodeling Sterling VA project.
Ceramic and Porcelain Tiles
- Style: Versatile and available in a wide array of colors, patterns, and sizes. Suitable for various kitchen styles.
- Durability: Resistant to heat and moisture, making them durable for kitchen use.
- Maintenance: Easy to clean, but grout lines may require occasional sealing to prevent staining.
Glass Tiles
- Style: Contemporary and sleek, with a reflective surface that adds depth to the kitchen.
- Durability: Resistant to stains and heat, but may be susceptible to scratches.
- Maintenance: Easy to clean, requiring regular wiping to maintain its shine.
Subway Tiles
- Style: Classic and timeless, suitable for both traditional and modern kitchens.
- Durability: Sturdy and long-lasting, resistant to stains and water.
- Maintenance: Grout lines may need occasional cleaning and sealing.
Natural Stone (e.g., Marble, Granite, Travertine)
- Style: Elegant and luxurious, providing a unique and natural appearance.
- Durability: Durable but requires proper sealing to prevent staining.
- Maintenance: Regular sealing is necessary, and some stones may be more prone to scratching.
Metal (Stainless Steel, Copper, Aluminum)
- Style: Industrial and contemporary, offering a sleek and modern look.
- Durability: Resistant to heat and stains but may show scratches over time.
- Maintenance: Wipes clean easily but may require polishing to maintain shine.
Mosaic Tiles
- Style: Offers a wide range of patterns and designs, suitable for various aesthetics.
- Durability: Sturdy and durable, but grout lines may require regular maintenance.
- Maintenance: Regular cleaning and sealing of grout lines are essential.
Engineered Stone (Quartz)
- Style: Uniform and contemporary, with a wide range of color options.
- Durability: Highly durable, resistant to stains, scratches, and heat.
- Maintenance: Virtually maintenance-free, as it doesn’t require sealing.
Vinyl or Peel-and-Stick Tiles
- Style: Affordable and available in various designs, suitable for budget-friendly makeovers.
- Durability: Susceptible to damage from heat and sharp objects.
- Maintenance: Easy to clean but may not be as long-lasting as other materials.
Cement Tiles
- Style: Offers intricate patterns and vibrant colors, adding a handmade, artisanal touch.
- Durability: Durable but may require sealing to prevent staining.
- Maintenance: Regular sealing and gentle cleaning to preserve the appearance.
Brick
- Style: Rustic and charming, suitable for farmhouse or industrial aesthetics.
- Durability: Sturdy and resistant to heat, but may absorb moisture.
- Maintenance: Regular sealing and occasional cleaning for longevity.
Pro Tips When Looking For Kitchen Renovation Services
When searching for kitchen renovation services specifically for your backsplash, it’s essential to focus on professionals who understand the nuances of this specific element of an old kitchen and kitchen remodeling. Here are the top five tips to guide you in finding the right contractor for kitchen renovation services:
Specialization in Backsplash Installation
Look for renovation services that specialize in backsplash installation. The intricacies of installing a backsplash require a certain level of expertise. Ask about their experience with different materials, patterns, and layouts for backsplashes. A specialized service is more likely to deliver a polished and professionally executed result.
Check Reviews and Portfolios Specifically for Backsplashes
While overall reviews and portfolios are important, pay particular attention to feedback and examples related to backsplash installations. Look for before-and-after photos of kitchens where they have installed backsplashes. Positive reviews and a strong portfolio in this specific area are indicators of competence.
Ask for References from Previous Backsplash Clients
Request references from clients most homeowners who have specifically hired the renovation service of a professional kitchen remodeling contractor for backsplash projects. Speaking directly with homeowners who have gone through a similar kitchen remodel or renovation can provide valuable insights into the service’s efficiency, attention to detail, and overall customer satisfaction regarding backsplash installations.
Verify Materials Expertise
Different backsplash materials require specific handling and installation techniques. Ensure that the renovation service is well-versed in working with the material you’ve chosen for your backsplash. Whether it’s ceramic tiles, glass mosaics, or natural stone, expertise in the chosen material is crucial for the successful outcome of your kitchen remodel.
Communication and Collaboration
Choose kitchen and bath renovation services that emphasize clear communication and collaboration throughout the process. The backsplash is a highly visible and personalized element of your kitchen, so it’s essential to work with professionals who value your input and ideas. A collaborative approach ensures that your vision is understood and implemented effectively by your kitchen remodeling contractor.
In A Nutshell
A kitchen backsplash is not only a stylish design element but also a functional necessity. Its role in protecting walls, facilitating easy cleaning, enhancing aesthetics, and contributing to the overall value of a home makes it an integral part of a well-designed and functional kitchen space.
Remember, the success of your next kitchen remodeling and backsplash project depends not only on the skill of your kitchen remodeling contractor and the kitchen remodeling services you get but also on effective communication and a shared understanding of your design goals.
Need help with a free estimate for your kitchen or bathroom remodeling in Sterling, VA?
Feel free to contact us and one of our professionals will get back to you promptly.